
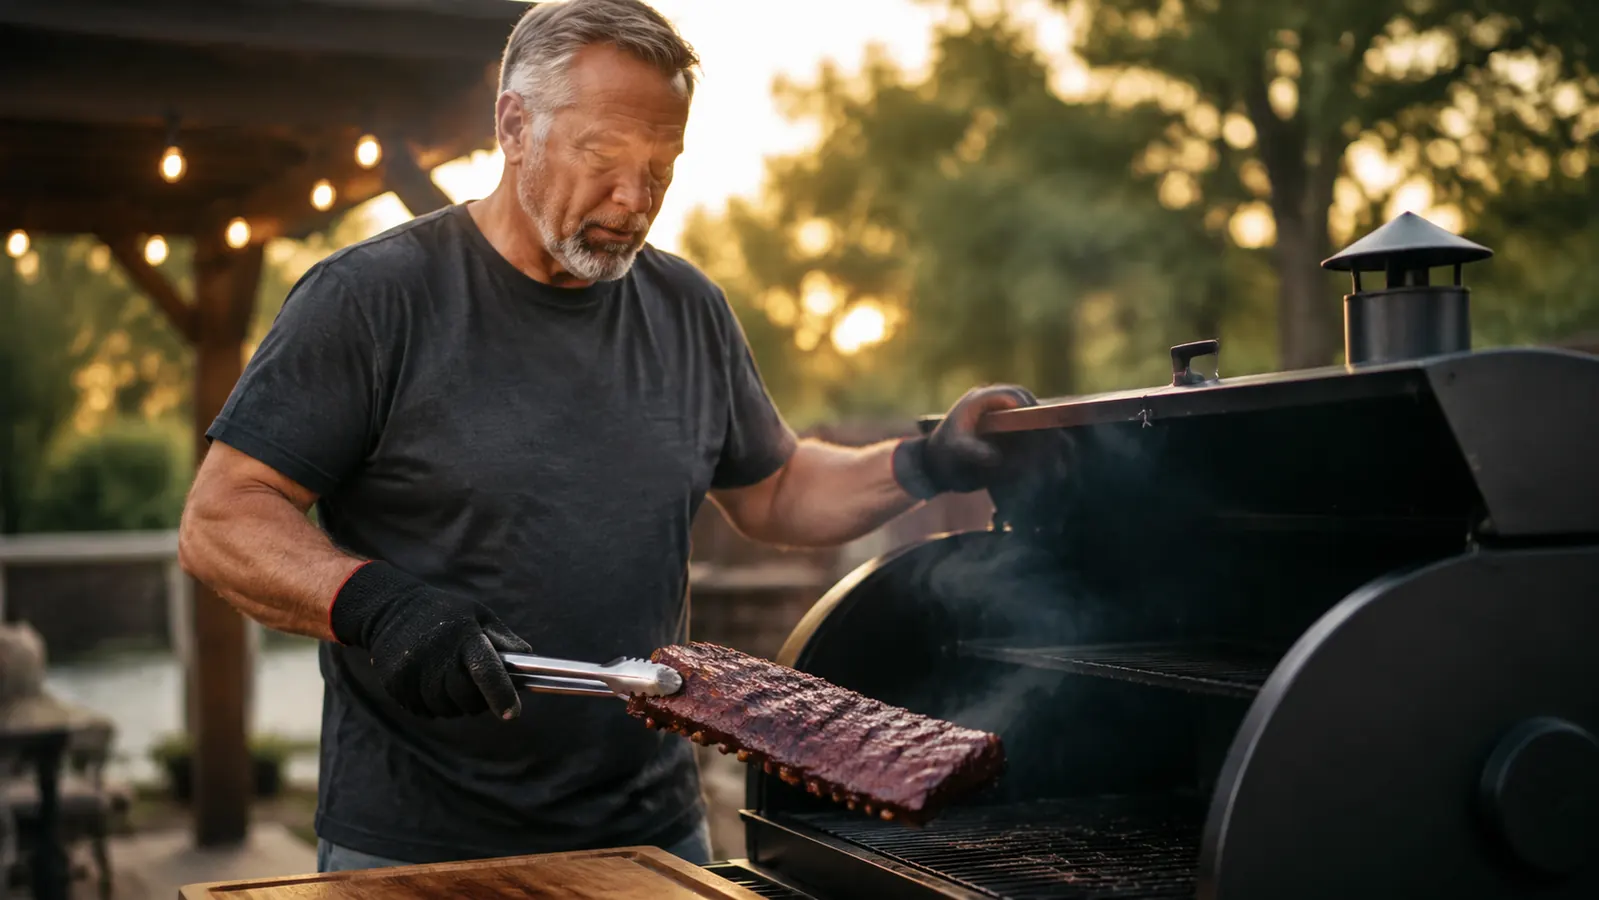
The first rack of ribs I ever smoked on a pellet grill came off the Pit Boss looking perfect and eating like a rubber hose. I'd babysat that thing for six hours, opening the lid every twenty minutes to peek, and I still got it wrong. It took me a full grilling season here in Kansas City, a lot of ruined racks, and finally forcing myself to stop lifting the lid before I figured out that smoking ribs on a pellet grill isn't about attention, it's about a process you trust enough to walk away from.
That's the whole appeal of a pellet grill over a stick burner or a charcoal setup, and it's the reason I switched to the Pit Boss 440 a couple years back. You set a temperature and it holds it, which means the fire management most people associate with smoking ribs mostly disappears. What's left is a straightforward five-step method, and once you've run it a couple times you'll be pulling tender, fall-off-the-bone ribs on a normal weeknight, not just for a big Saturday cookout. This is the exact routine I use every time, from trimming the rack to knowing precisely when to pull it, no guesswork required.
The pellet grill that made ribs a weeknight thing again
The Pit Boss 440 Mahogany Series holds a rock steady 225F for hours without me touching a vent or shoveling coals. If you're still fighting a fire to smoke ribs, this is the upgrade that fixes it.
Amazon Check Today's Price on Amazon →Step 1: Trim the Rack and Pull the Membrane
Before any rack of ribs touches my Pit Boss, it gets trimmed. I look for loose flap meat hanging off one end, any silver, hard cartilage tips, and I square the rack up so it cooks evenly end to end. St. Louis style ribs come mostly trimmed from the store, but baby backs almost always have a flap of meat on the underside that will dry out and burn long before the rest of the rack is ready. Ten minutes with a sharp knife here saves you from a rack that's perfect on one half and jerky on the other.
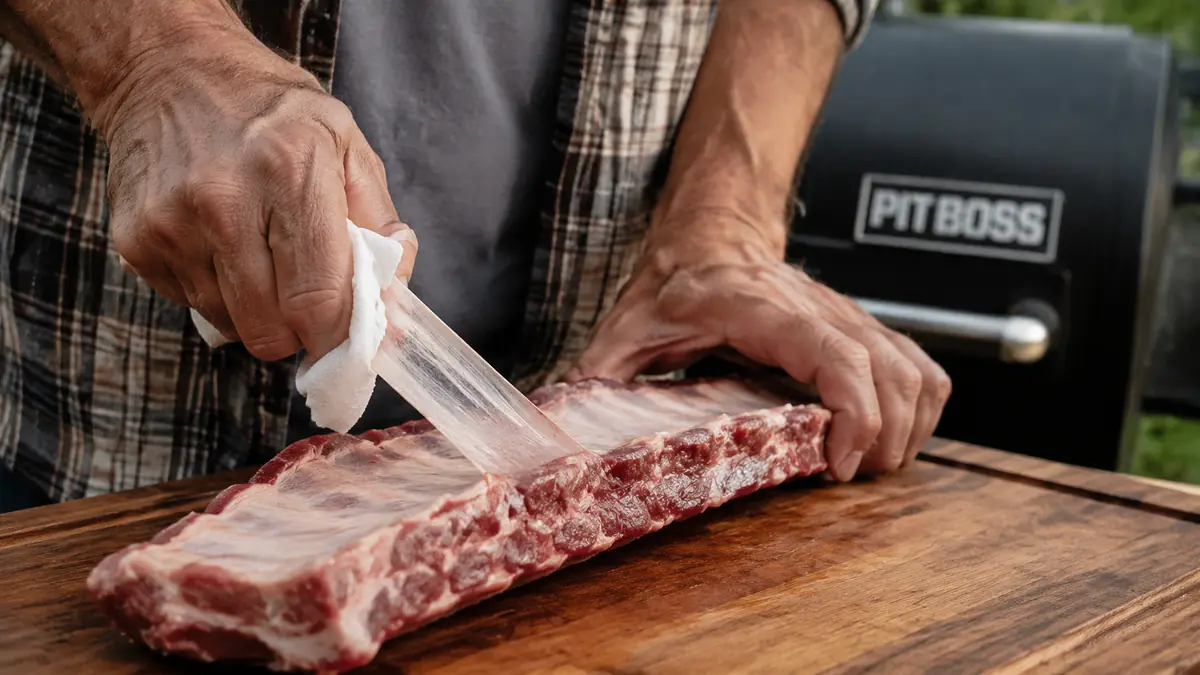
Then comes the membrane, that thin, tough layer on the bone side of the rack. I slide a butter knife under one corner, get enough of an edge to grab with a paper towel, and peel the whole thing off in one piece if I can manage it. Skip this step and you'll never get seasoning or smoke to penetrate the bone side, and the texture ends up like biting into a balloon. My grandson Eli helped me with this the last time he was over, and even at twelve he got the hang of it faster than I did the first ten times I tried.
If a corner won't budge, work in from a different spot rather than fighting the same stubborn patch. It doesn't need to come off in one clean sheet, it just needs to come off. A few small strips left behind won't ruin the cook, but the bulk of that membrane has to go.
Step 2: Season Generously and Let the Rub Set
I keep my rib rub simple, brown sugar, paprika, garlic powder, onion powder, a little cayenne for heat, black pepper, and kosher salt. A thin coat of yellow mustard first helps the rub stick and you won't taste it once the ribs are done, it just disappears into the bark. Coat both sides generously, pressing the rub in rather than just sprinkling it on top, and don't be shy with it. A lot of that seasoning is going to render off with the fat over a five to six hour cook, so what looks like too much at the start is usually about right by the time it hits the plate.
Once they're seasoned, I let the racks sit at room temperature for about thirty minutes to an hour while I get the Pit Boss up to temp, or if I've got the time, I'll season them the night before and let them rest uncovered in the fridge overnight. That extra time lets the salt work its way into the meat instead of just sitting on the surface, and I notice a real difference in how evenly the bark forms compared to when I've rushed straight from rub to grill.
When Eli's coming over, I'll pull his rack aside before I hit it with cayenne and keep his half milder, more brown sugar, less heat, so he's not reaching for a glass of milk halfway through dinner. That's really the beauty of doing your own rub instead of relying on a bottled one, you can adjust it rack by rack for who's actually eating it that night without changing anything else about the method.
Step 3: Set the Pellet Grill to 225F and Load the Right Pellets
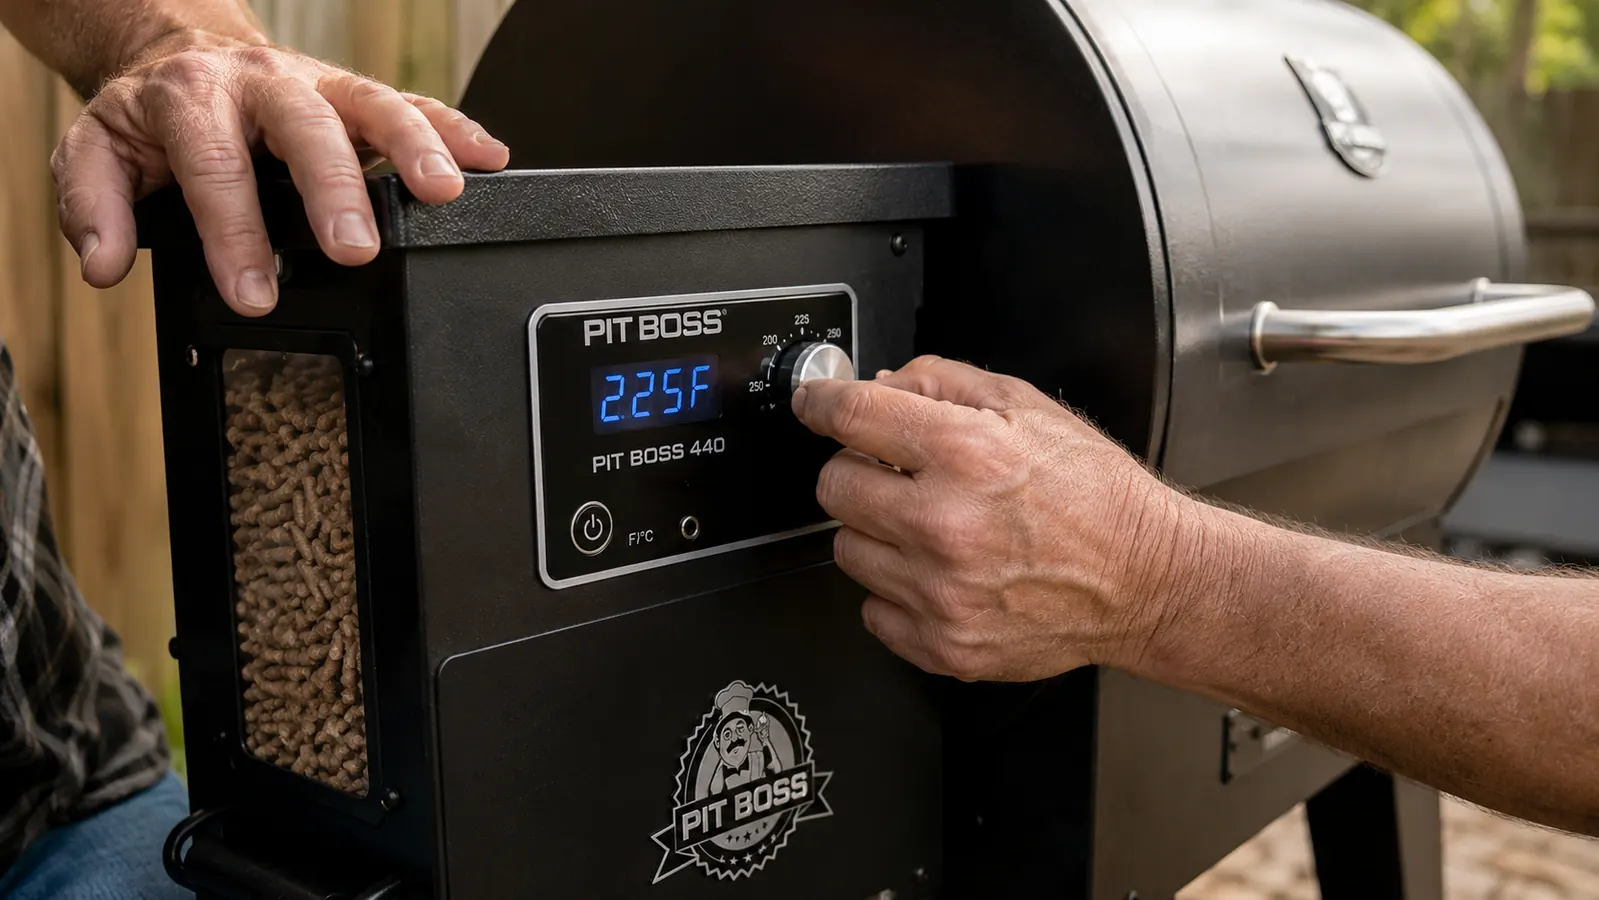
This is where the pellet grill genuinely earns its keep. I set the Pit Boss 440's digital controller to 225F, and unlike babysitting a charcoal fire on my Weber kettle, I don't need to touch a vent or shovel more coals in an hour later. The controller reads the internal temperature and feeds pellets automatically to hold that number, which is the whole reason I stopped dreading rib day. For wood, I run a hickory and applewood blend most of the time, hickory gives you that classic BBQ backbone and the apple softens it with a little sweetness. Straight mesquite is too aggressive for a long cook like ribs in my experience, it's better suited to a quick sear on something like a steak.
I always start with a full hopper before I load the ribs. A five to six hour cook can burn through more pellets than you'd expect, and running out partway through means a temperature dip you won't catch until the meat's already behind schedule. Once the grill's holding steady at 225F, which usually takes ten to fifteen minutes after I first fire it up, the racks go on bone side down, and that's when I close the lid and genuinely leave it alone.
The 440's hopper holds about five pounds of pellets, which is enough to get most rib cooks done without a refill, but I still keep a spare bag in the garage rather than finding out mid-cook that I'm running low. Pellets that have picked up moisture from sitting in a damp garage over the winter burn inconsistently and throw off more ash than smoke, so I store mine in a sealed bin and only load what I need into the hopper each time rather than leaving a half-empty bag open to the air.
Step 4: Run the 3-2-1 Method as a Guide, Not a Rulebook
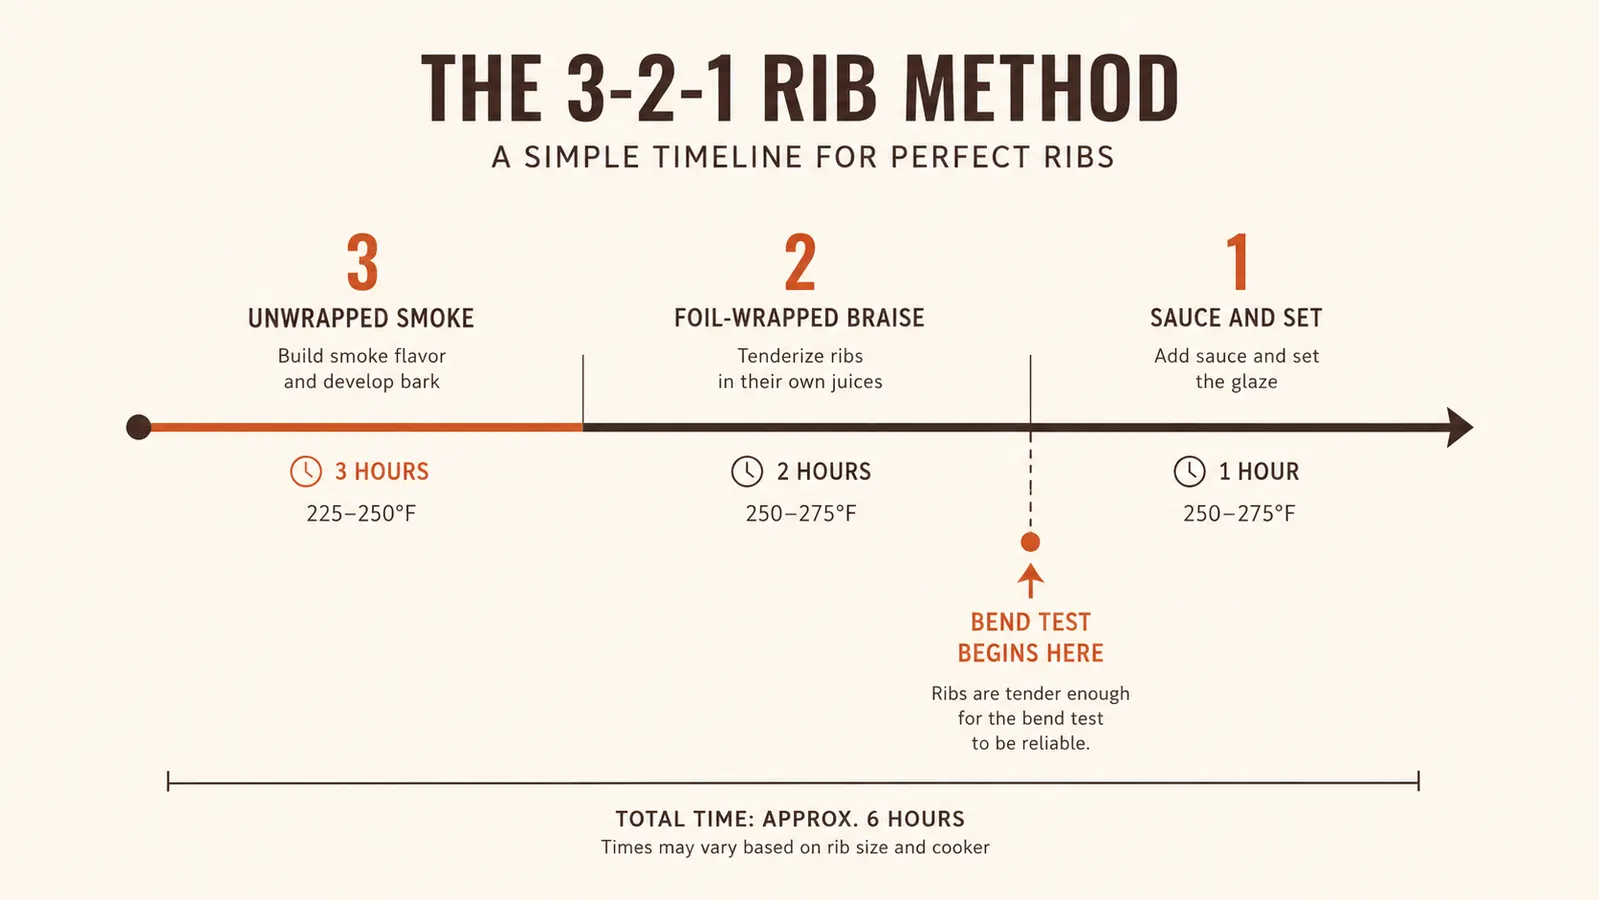
The 3-2-1 method is the standard starting point for smoking ribs and it's a good one. Three hours unwrapped directly on the grate taking on smoke, two hours wrapped tightly in foil with a little apple juice or butter to braise and tenderize, then one final hour unwrapped again to firm the bark back up and let sauce set if you're using it. For baby backs I usually shorten that to something closer to 2-2-1, since they're thinner and run smaller than a full rack of St. Louis style spares, which handle the full 3-2-1 timing better.
What I've learned after a lot of racks on the Pit Boss is that these numbers are a guide, not a countdown timer you follow blindly. Grill temp can drift a few degrees on a windy day, even with a pellet grill holding steady better than any fire I ever managed by hand, and rack thickness varies from one package to the next. I treat the wrap phase as the point where I start checking for doneness with my eyes and hands rather than the clock alone. If the bark looks set and the color is where I want it heading into hour three, I wrap. If it needs another twenty minutes, I give it that instead of rushing to match a number on paper.
For the wrap itself, I've gone back and forth between heavy duty foil and peach butcher paper. Foil gives you a faster, more aggressive braise since it traps every bit of steam, which is what I reach for when I'm running behind schedule and need the ribs to catch up. Butcher paper breathes a little, so the bark stays firmer through the wrap phase, which I prefer when I've got the time and want more bite to the crust. Either one works with this method, it's really just a matter of how soft you want that final texture.
Step 5: Know When They're Actually Done With the Bend Test
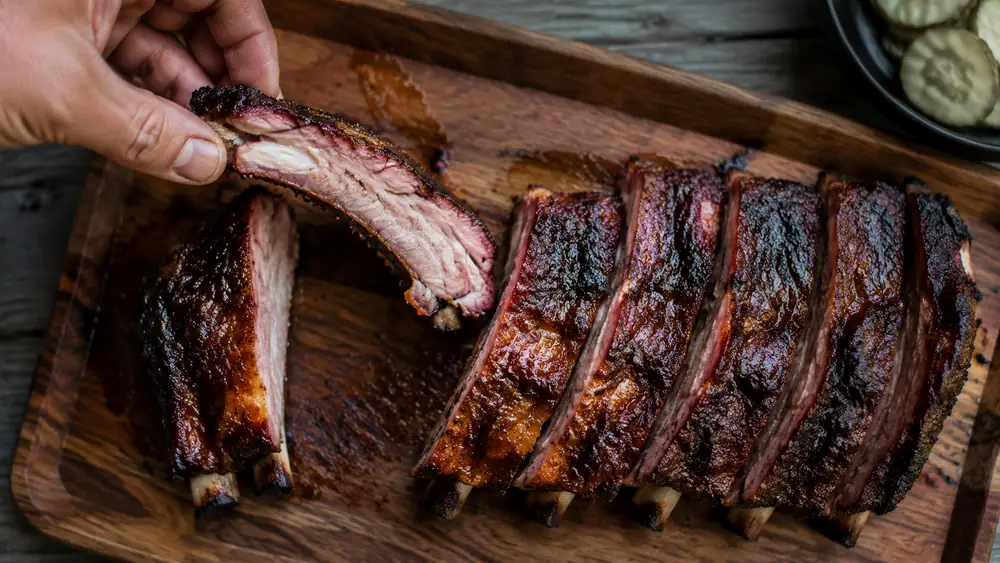
This is the step that separates good ribs from great ones, and it's the one most people skip because they're just watching a clock. Once the ribs are back on unwrapped for that final hour, I start checking with the bend test. I pick the rack up in the middle with tongs and give it a gentle bounce. If it's ready, the surface of the meat will crack slightly and the rack will droop and bend almost in half under its own weight. If it just flexes stiffly with no cracking, it needs more time.
I also keep a probe thermometer handy and look for something in the 195 to 203F range in the thickest part of the meat, avoiding the bone. That range is where collagen has broken down into gelatin, which is what actually gives you that tender pull instead of tough, chewy meat. Ribs don't have one magic number the way a steak does, so I use the temperature as a confirmation alongside the bend test, not the only signal. If you're sauced up for that last hour, this is also when I brush on a final coat and let the grill's heat tack it into a glossy, not gummy, finish.
Baby backs usually hit that bend a little earlier than a full rack of spares, sometimes twenty to thirty minutes sooner, simply because there's less meat to render through. I don't treat that as a rule I can set a timer to, I check both the same way every single time, by lifting and bouncing the rack myself. After enough cooks you start to feel the difference in your wrist before you even see the crack in the bark, but until you're at that point, trust the test over your memory of how long last week's rack took.
Ribs don't tell you they're done with a number on a clock. They tell you with a bend and a crack in the bark.
What Else Helps
A few habits outside the five main steps make a real difference over time. I always let the ribs rest for ten to fifteen minutes under loose foil before slicing, straight off the grill and onto the cutting board loses juice you worked six hours to keep in. I slice between the bones rather than across them, and I cut slowly enough to actually see where the bones sit instead of guessing and hacking through one. Diane's stopped commenting on ragged slices since I started taking the extra thirty seconds per rack.
I also keep a spray bottle of apple juice and apple cider vinegar mixed about half and half for spritzing the ribs every forty-five minutes or so during that first unwrapped phase. It's not going to save an undercooked rack, but it keeps the surface from drying out and helps the smoke and bark develop a little deeper color. And if you're cooking two racks at once, which I usually am now that Eli's old enough to eat a full one on his own, give yourself extra room on the grate so smoke can actually circulate around both, not just the one closer to the firepot.
Cleanup matters more than people give it credit for too. I empty the grease bucket on the Pit Boss and wipe down the grates after every rib cook, because built-up grease from a long, fatty cook is exactly what causes flare-ups the next time you fire it up for something quick like burgers. Five minutes with the grates while they're still warm beats scraping cold, hardened grease off later, and it keeps the grill running the way it did the first season I owned it.
Ready to run this method yourself
Every step above depends on a grill that actually holds its temperature without you standing over it. That's the reason the Pit Boss 440 has been my go-to for ribs for two seasons running.
Amazon Check Today's Price on Amazon →