

Every fall for about eight years running, I scrubbed a wire brush across the grates on my old propane grill and never thought twice about it, until the night Diane pulled a bent wire bristle out of a burger with a pair of tweezers before Eli took his first bite. That was the night the wire brush went in the trash can out by the garage and a bristle-free grill brush came to live in the tool caddy next to my Pit Boss. Mine is a Weetiee, the same coil-head design I still reach for two seasons later, and if you have never had that scare, count yourself lucky and let this guide save you the trouble anyway.
Cleaning grill grates the right way is not complicated, but it is easy to do wrong, and doing it wrong with a bristle-free brush is actually harder than doing it right, because the design works differently than the wire brush you probably grew up using. I run a Pit Boss 440 pellet grill for most of my low-and-slow cooks and a 22-inch Weber kettle for quick weeknight grilling, and I clean both the exact same way now, with the same Weetiee brush, whether the grates in front of me are cast iron, stainless steel, or porcelain-coated. Here is exactly how I do it, step by step, the way I would walk you through it if you were standing next to me in my driveway on a Sunday afternoon in Kansas City.
A quick word before we get into the steps. This is not one of those jobs where more elbow grease automatically means a cleaner grate. I fought my grates for years thinking harder was better, and I ended up with scratched porcelain coating and a sore shoulder for my trouble. The technique matters more than the muscle, and that is really the whole secret behind why a bristle-free brush works as well as it does once you use it correctly. I wish somebody had told me that back when I was scrubbing away with a wire brush every Saturday morning, it would have saved me a lot of aggravation and probably a couple of coatings on my old grates.
Skip the Wire Bristles. Here's the Brush I Trust on Every Grate I Own.
The Weetiee bristle-free grill brush uses a coiled stainless head and a built-in scraper instead of loose wire bristles, so there is nothing to snap off and end up on your plate. It works on cast iron, stainless steel, and porcelain grates, and the 18-inch handle keeps your hand well clear of the heat. It has been the only brush in my caddy for two grilling seasons now.
Amazon Check Today's Price on Amazon →Step 1: Clean the Grates While They Are Still Warm, Not Cold
The single biggest mistake I made for years was letting the grates cool all the way down before I ever picked up a brush. Cold, hardened grease is stubborn, it grabs onto the metal and needs real scraping to break loose. Warm grease and light char lift off in a fraction of the time, almost like the heat is doing half the job for you before the brush ever touches the surface. My routine now is simple: as soon as I pull the last rack of ribs or the last batch of burgers off the Pit Boss, I close the lid and let the residual heat run for about five minutes, then I go to work with the brush while the grate is still warm enough that I would not want to touch it bare-handed for more than a second.
On the Weber kettle it is even easier, since the coals are already doing the work. I brush the grates right after the food comes off, while the coals are still glowing underneath and the grate is at its hottest. The bristle-free head handles warm grease without gumming up the way a wire brush does, and you end up using a fraction of the elbow grease you would need on a cold, greasy grate the next morning. I have timed myself on this more than once out of pure curiosity, warm cleanup runs about three minutes, cold cleanup on the same grate can run fifteen. That difference alone is why I never let a grate sit dirty overnight anymore.
Step 2: Work the Coil Head With the Grain of the Grate, Not Against It
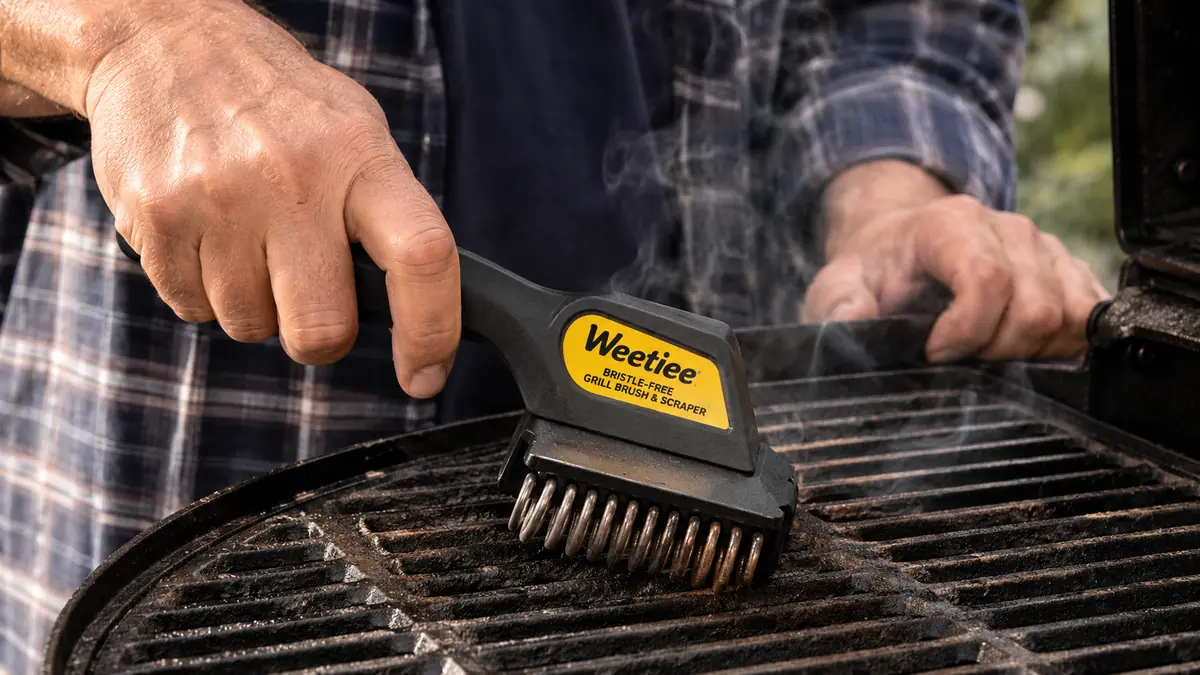
This is where a lot of folks get frustrated with a bristle-free brush and go back to wire, and it is almost always a technique problem, not a tool problem. The coiled stainless head on a bristle-free brush is meant to be worked back and forth along the length of each bar, following the same direction the grate bars run, not scrubbed in circles or side to side across them like you might with a wire brush.
On my Pit Boss, the grates are heavy-gauge porcelain-coated steel, so I keep the pressure moderate and let the coil head do the work without pressing hard enough to scratch the coating underneath. On the cast iron grates I inherited from my father-in-law's old kettle grill, I can lean into it harder, since cast iron takes more abuse and actually benefits from a slightly more aggressive pass. Stainless grates fall in the middle, firm pressure but always with the grain, never digging in at an angle that catches the edge of a bar.
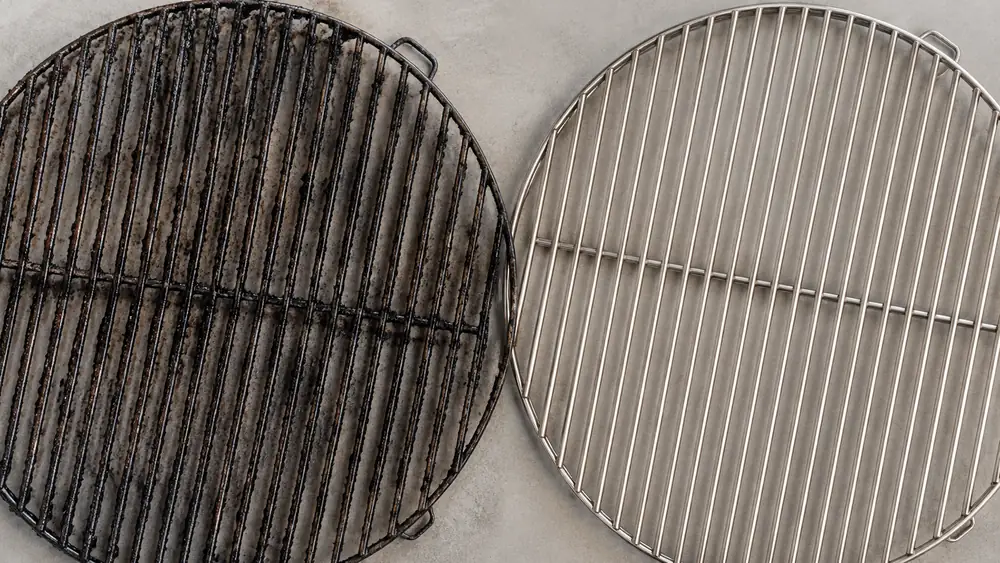
I go over each bar two or three passes, checking as I go rather than assuming one pass gets it all. You will feel the difference under your hand once the char breaks free, it goes from a rough, sticky drag to a smooth glide almost immediately, and that feel is your best signal that a section is actually clean rather than just looking clean.
Step 3: Use the Built-In Scraper on the Corners and the Grate Ends
The coil head does most of the work across the open span of the grate, but the corners, the edges near the flame tamer, and the spots where the grate meets the frame are a different story. That is where the flat metal scraper edge built into the head of a good bristle-free brush earns its keep. I turn the brush so the scraper edge sits flat against the metal and push it along the tight spots where buildup collects and the coil cannot quite reach no matter how you angle it.
This is also the step people skip, and it is the step that lets grease pockets build up over months until you get a flare-up you did not expect right in the middle of a cookout. On the Weber kettle, I run the scraper edge around the inside rim of the cooking grate where it rests on the charcoal grate below, since that little ledge collects more drippings than almost anywhere else on the whole cooker. Same thing on the Pit Boss, right where the grate meets the flame broiler plate, a spot most folks never think to check until something starts smoking that has no business smoking.
Step 4: Wipe Down and Check the Grate Under Good Light
Once I have brushed and scraped, I fold a paper towel a few times, hold it with tongs, and wipe each bar down in one pass. This does two things. It clears off any loosened char before it can flake into your next meal, and it gives me a chance to actually look at the grate up close instead of assuming the job is done because the brush went over it once.
I check for any leftover dark, sticky patches, which usually means I rushed a section, and I run the brush back over those spots for a second pass before moving on. I also glance the grate over for anything that looks like it does not belong, an old piece of foil, a stray bit of vegetable skin from Diane's grilled peppers, that kind of thing. Takes fifteen seconds and it has saved me from a surprise more than once, especially with a twelve-year-old grandson who eats fast and does not always look at his plate first.
Step 5: Oil or Season the Grates Before You Put the Lid Down
A clean grate left bare is an invitation to rust, especially on cast iron and on stainless grates that see Kansas City humidity most of the summer. Once the grate is clean and wiped down, I fold a fresh paper towel, dip a corner in a neutral oil like canola, and wipe a thin coat across every bar while the grate still has a little residual warmth to help the oil soak in rather than just sitting on top.
On the cast iron grates specifically, I do this every single time, no exceptions, because cast iron will flash rust in a matter of days if you leave it bare after a wipe-down, sometimes overnight if the weather is humid. On the porcelain-coated Pit Boss grates, I still do it, just a lighter pass, mostly to keep the surface from looking dull and to make the next cleaning even easier since a lightly oiled grate never lets char bond as tightly. Close the lid, and the whole job, start to finish, is done in under ten minutes.
What Else Helps Keep Your Grates in Good Shape
The brush handles the heavy lifting, but a few habits around it make a real difference over a full grilling season. I keep a grill cover on both the Pit Boss and the Weber year round, which cuts down on the humidity and dust that speed up rust between cooks. I also do a quick warm-brush pass after every single cook rather than saving it all up for one dreaded deep clean, since five minutes after each meal beats forty-five minutes of scraping baked-on grease once a month. Diane will tell you I am stubborn about this one habit more than almost anything else in the yard.
Once a season, usually right around when I switch from ribs and brisket back to quick weeknight burgers, I do a full deep clean where I pull the grates out entirely and brush every side, not just the cooking surface, including the underside where drippings collect and bake on unnoticed. I also rinse the Weetiee brush head itself under hot water every few uses and let it air dry, which keeps the coils from holding onto old grease and passing it back onto a clean grate the next time around. It is a small habit, but it is the difference between a brush that lasts two seasons and one that gets tossed after a summer.
The wire bristle that ended up in Diane's tweezers is the reason I switched, but the fifteen minutes I save every weekend is the reason I never went back.
The Same Brush I Reach for Before Every Cookout
If you are still working a wire brush across your grates, or scrubbing cold, hardened grease with a scouring pad, the Weetiee bristle-free brush will change how you feel about cleanup. The coil head and built-in scraper cut the job down to a few minutes, and there is nothing loose to end up where it does not belong.
Amazon Check Today's Price on Amazon →